



 225 322

225
MASONS SUPPLY COMPANY
Oregon (800) 537-3407 ♦ Washington (800) 537-6216
Clackamas | Eugene | West Eugene | Hillsboro | Medford | Portland | Salem | Wilsonville | Ridgefield | Seattle | Tacoma | Woodinville
M A S C O . N E T
POUR IN PLACE
Installation Procedures
1. Locate lowest spot or any area where excess water will
accumulate.
2. Dig trench wide enough to allow for 3" of back fill on
each side of Spee-D, 2" for Mini Channel, 1" for Micro
Channel and 4" for Pro Series. Dig trench deep enough
for overall height of channel and grate plus 3" for Spee-d,
2" for Mini, 1" for Micro and 4" for Pro Series. Allow 1/4"
recess of grate below surface level for additional
drainage.
3. Backfill trench with either concrete or sand and tamp
thoroughly. This allows for a level base and provides
support. Concrete is always recommended for
automobile traffic applications.
(NOTE: Trench bed must
be compacted prior to installing channel.)
4. Measure and cut channel with fine tooth saw
to desired length and remove burrs. Assemble
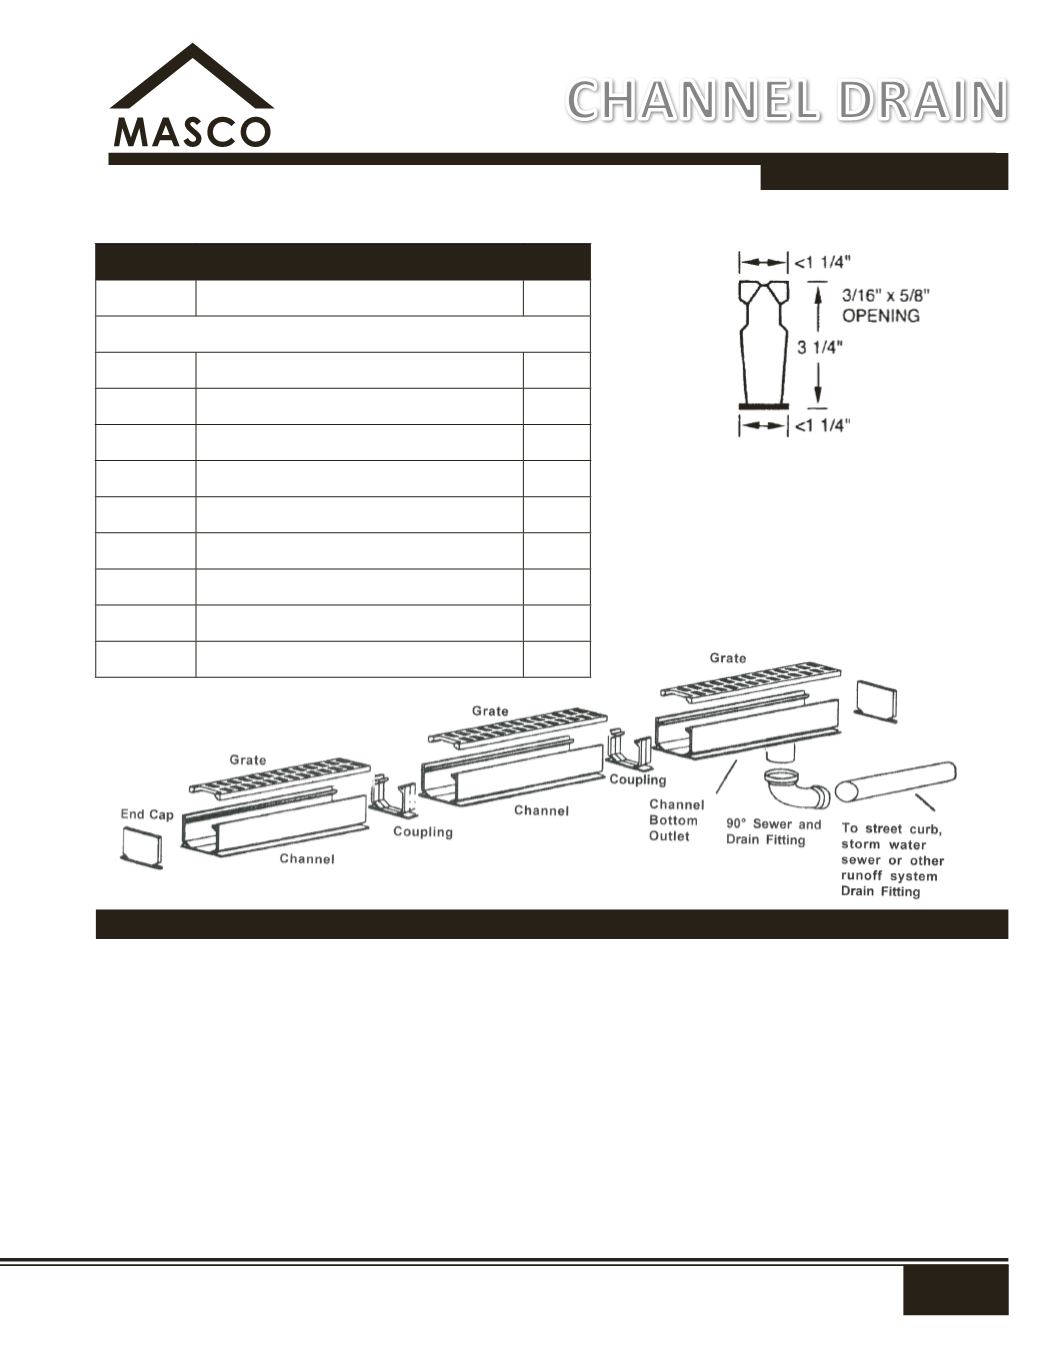
channel, using couplings and channel
accessories. Test for accurate measurements by
placing channel in trench.
(NOTE: You must allow
for bottom or end outlets to connect to sewer and
drain pipes).
5. Disassemble channel drain and apply PVC
primer and PVC cement to all joints. Reassemble
channel joints. Allow cement to dry thoroughly.
6. Install grate on channel. Completely cover grate
with duct tape.
(NOTE: Grate must be on channel
prior to installation to prevent deflection by
concrete).
No.
Description
Color
NDS 8003
10' Channel Includes (1 Coupler)
Grey
Accessories
NDS 8653
Channel Clean Out
Grey
NDS 8481
Coupler
Grey
NDS 8473
End Cap
Grey
NDS 8463
End Outlet, w/1-½" Sch. 40
Grey
NDS 8503
Bottom Outlet w/ 1-½" Sch. 40 Outlet
Grey
NDS 8513
Side Outlet w/ 1-½" Sch. 40 Outlet
Grey
NDS 8383
90° Elbow Channel
Grey
NDS 8303
45° Elbow Channel
Grey
NDS 8373
Tee Channel
Grey
MICRO
CHANNEL DRAIN